How to Rasterize in Photoshop: Complete Guide
You select the Brush Tool, click on your canvas, and immediately hit a roadblock: a warning pop-up declares, "This text layer must be rasterized before proceeding." If you decline, your brush cursor turns into a prohibition circle. Understanding what rasterizing does—and when you should or shouldn't do it—is fundamental to mastering Photoshop. Here is everything you need to know about rasterizing layers cleanly.
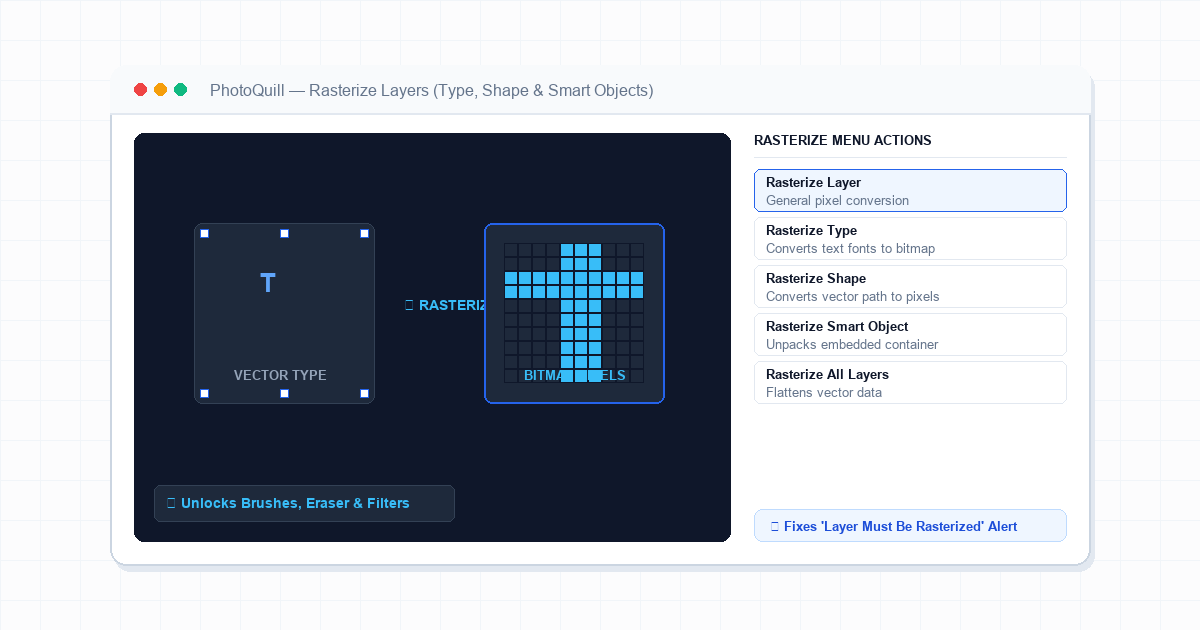
What Does "Rasterize" Actually Mean?
Computer graphics fall into two fundamental categories: vectors and rasters. Vectors are mathematical formulas describing paths, curves, and coordinates. Because they are formulas, you can scale a vector logo up by 5,000% and it will remain pin-sharp with zero pixelation.
Rasters (or bitmaps), on the other hand, are rectangular grids of colored pixels. Photos taken with digital cameras are rasters. Tools that alter individual pixel values—such as the Brush, Eraser, Smudge, and Healing tools—cannot operate on mathematical vector formulas. They demand pixels.
Rasterizing is the conversion process: Photoshop "bakes" your scalable vector curves, text glyphs, or smart object containers into fixed bitmap pixels. If you ever make an accidental rasterization error, learn how to recover your layers with our guide on undo and history shortcuts in Photoshop.
| Layer State | Storage Format | Editable Text / Scalability | Pixel Tool Support |
|---|---|---|---|
| Vector / Type Layer | Mathematical curves | Infinite resolution & live font editing | Locked (requires rasterization) |
| Smart Object Layer | Protected embedded container | Non-destructive filters & source preservation | Locked (must edit contents or rasterize) |
| Rasterized Layer | Fixed bitmap pixel grid | Resolution locked to canvas DPI | 100% unlocked (Brush, Eraser, Clone Stamp) |
Ctrl+J) before rasterizing text or smart objects, then hide the backup original. If a client later requests a typo correction, you can simply unhide the original vector type.
The 4 Different Types of Rasterization in Photoshop
Under Layer > Rasterize, Photoshop provides several specialized conversion modes depending on your active layer:
Rasterize Type
Converts live text characters into pixel shapes. Once rasterized, you can erase portions of letters, apply distortion liquify filters, or use the Clone Stamp to create distressed grunge textures. However, you can no longer change spelling, font family, or kerning.
Rasterize Shape
Converts vector pen paths and shape tool layers (rectangles, stars, custom shapes) into bitmap pixels. The path outline disappears, unlocking standard pixel selection tools like the Magic Wand.
Rasterize Smart Object
Smart Objects act as protective wrappers around raw images or embedded vector graphics. Rasterizing strips away the container, turning the content into regular pixels that can be directly cloned or retouched with the Clone Stamp tool.
Rasterize All Layers
A bulk utility under Layer > Rasterize > All Layers that converts every text, shape, and smart object in your entire layer stack into flat bitmaps in a single click.
Alternative to Rasterizing: When You Should Avoid It
While rasterizing is necessary for certain pixel edits, it is permanent. Before rasterizing, consider whether non-destructive alternatives can achieve your creative goal without losing vector flexibility:
- Need to hide part of text? Use a Layer Mask instead of the Eraser Tool. Paint with black on the mask to hide letters non-destructively.
- Need color adjustment? Add an Adjustment Layer (like Hue/Saturation or Curves) clipped to your type layer instead of painting color directly onto pixels.
- Need photo retouching? Create a New Blank Layer above your artwork and check "Sample All Layers" in your tool options, keeping your underlying photos pristine. For broader workflow tips, explore our guide on how to edit photos professionally.
Step-by-Step: How to Rasterize Layers in PhotoQuill
PhotoQuill handles vector type, shapes, and bitmap rasterization with complete Photoshop layer parity. Follow these steps:
Select Your Target Layer
In the right-side Layers panel, click on the text, shape, or smart object layer you want to edit.
Create a Safety Backup
Press Ctrl+J (Command+J on Mac) to duplicate the layer. Click the eye icon next to the lower copy to hide it as an editable backup.
Execute the Rasterize Command
Right-click the top layer name and select Rasterize Layer, or click Layer > Rasterize > Layer from the top navigation menu.
Confirm Pixel Conversion
Notice the text or smart object indicator on the layer thumbnail disappears. The layer now shows standard checkered pixel transparency.
Edit with Any Pixel Tool
Select the Brush Tool (B), Eraser Tool (E), or Smudge Tool and paint directly onto your newly rasterized artwork without alerts.