How to Outline Text in Photoshop (Stroke & Hollow Effects)
Outlined text is an indispensable typography tool for YouTube thumbnails, promotional posters, sports banners, and social flyers. Adding a clean outline—known as a stroke—separates headlines from busy photo backgrounds, ensuring maximum readability at any scale. Whether you need a subtle 2-pixel black border or a trendy hollow transparent text treatment, here is the complete guide to outlining text in Photoshop and PhotoQuill.
Layer Style Stroke vs. Selection Stroke: Which to Use
In older design software, outlining text required selecting the letter outlines, expanding the selection by several pixels, and filling a new layer with black. That destructive method permanently locked text into fixed bitmaps, making typographical adjustments impossible without starting from scratch.
Modern design pipelines rely on non-destructive Layer Styles. A Layer Style Stroke is rendered dynamically using GPU shaders directly against vector glyph curves. You can change font sizes, rephrase text, or modify outline colors at any time.
To produce dynamic layouts with angled headings, see our tutorial on how to curve text in Photoshop to combine arch warps with crisp outlines.
| Stroke Position | Visual Behavior | Corner Sharpness | Recommended For |
|---|---|---|---|
| Outside | Expands outwards from letter contours | Maintains internal letter anatomy | Thumbnails, posters, and heavy display fonts |
| Inside | Contracts inwards into character glyphs | Preserves outer footprint, thins letters | Chunky sans-serifs where outer bounding box is locked |
| Center | Splits width equally inside and outside | Can round sharp corners slightly | Abstract art and geometric wireframe typography |
The Trendy "Hollow Text" Effect (Fill 0% Secret)
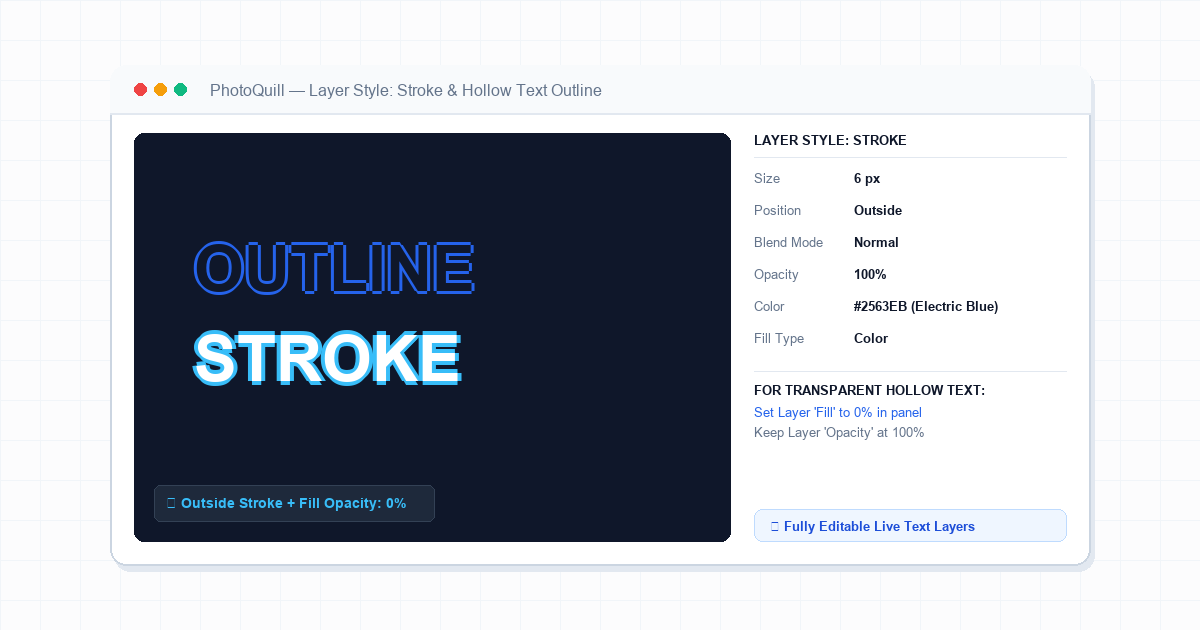
One of the most requested modern streetwear and editorial styles is hollow text: an outline of words through which the background image shows through clearly.
Opacity vs. Fill Opacity in the Layers Panel
Beginners often lower the Opacity slider on the text layer, which fades both the letters and the stroke outline simultaneously into gray transparency.
The secret lies in the Fill slider located directly underneath Opacity. Lowering Fill to 0% removes 100% of the internal letter color while preserving 100% of your Layer Styles intact. You get a transparent window bordered by a razor-sharp outline.
Double Stroke Technique (Sticker Outlines)
For sticker-style cutouts and e-commerce stickers, apply an initial 4px black outline set to Outside. Next, duplicate your text layer, position it behind the original, and give it a second 12px white stroke.
To ground the floating sticker onto textured surfaces, combine this technique with our guide to adding realistic drop shadows in Photoshop.
Color Harmony and Readability Guidelines
An outline is only as effective as its color contrast against the surrounding palette. Follow these golden rules for readability:
- High Contrast Values: Pair bright white text with dark navy or charcoal outlines against light backgrounds. Over dark scenes, pair neon yellow text with deep black strokes.
- Complementary Tones: Instead of harsh pure black (
#000000), sample a dominant dark color from your photo (such as dark espresso brown or midnight blue) to create a sophisticated editorial look. - Harmonizing Brand Colors: If your brand identity requires specific hex hues, use color replacement techniques to align typography outlines with existing logo elements.
Step-by-Step: How to Outline Text in PhotoQuill
PhotoQuill features full Layer Style support directly inside your web browser. Follow these steps to outline any text:
Add Your Text Layer
Select the Horizontal Type Tool (T) from the left toolbar. Click anywhere on the canvas, type your heading, and select a bold font weight from the top options bar.
Open Layer Styles
In the right-side Layers panel, double-click the empty space to the right of your text layer name, or navigate to Layer > Layer Style > Stroke... in the top menu.
Adjust Stroke Properties
In the dialog window, check the Stroke option. Set Position to Outside, adjust Size to 6px, and keep Opacity at 100%.
Choose Your Outline Color
Click the Color swatch box inside the stroke settings. Pick your preferred outline tone from the color picker, then click OK.
(Optional) Set Fill to 0% for Hollow Effect
If you desire transparent hollow typography, locate the Fill input at the top of the Layers panel and drag it down to 0%. Export your artwork via File > Export PNG.