How to Make a Clipping Mask in Photoshop (With Shortcuts)
Clipping masks allow graphic designers to confine photos, foil textures, or paint strokes inside editable typography and custom vector shapes. Unlike destructive crop tools, clipping masks leave your original graphics intact, allowing you to reposition, rotate, or swap textures at any stage of production. Here is everything you need to know about mastering clipping masks in Photoshop and PhotoQuill.
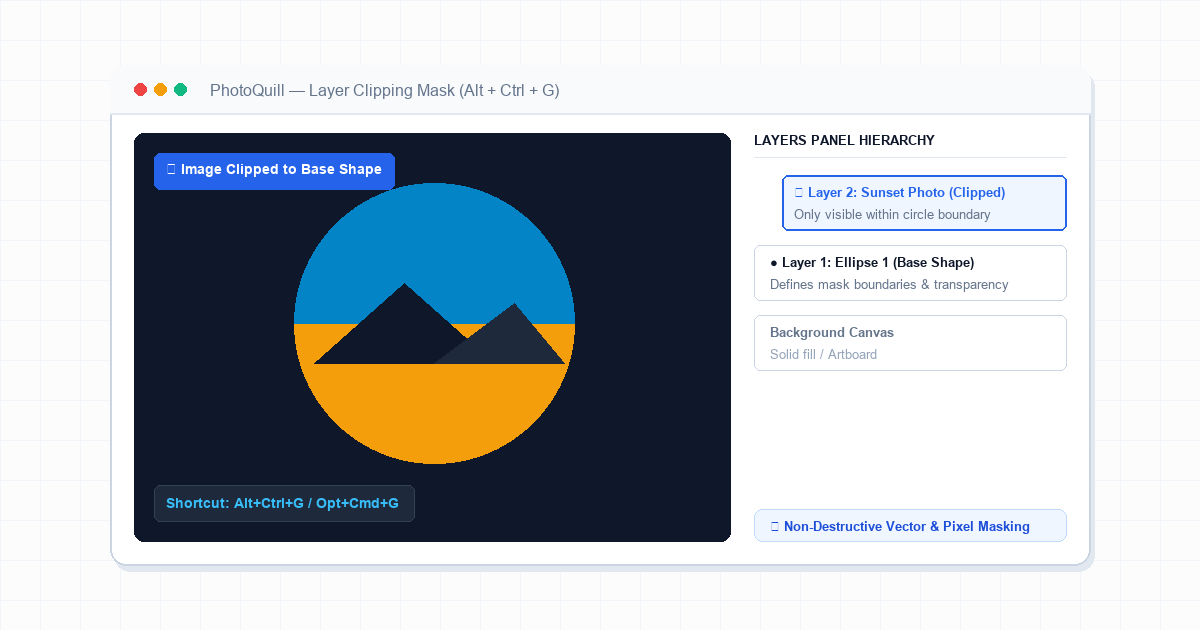
Clipping Masks Explained: Base Layers vs. Content Layers
In digital graphic design, a clipping mask links two or more layers together based on transparency. The bottom layer acts as the base (or cookie cutter), defining which areas are opaque and which are transparent. The layer directly above acts as the content (or dough), filling only the boundaries provided by the base.
If you draw a bold circle on Layer 1 and place a mountain panorama on Layer 2, activating a clipping mask crops the panorama to the circle. The pixels outside the circle remain completely preserved in memory; moving the panorama slides the landscape around inside the circular window without breaking vector edges.
If you are combining multiple design assets before clipping, review our tutorial on merging layers in Photoshop to keep your layer palette organized.
| Masking Technique | Source Definition | Editability | Primary Strength |
|---|---|---|---|
| Clipping Mask | Layer below (alpha/fill) | Fully independent transforms | Clipping photos inside text, shapes, or mockups |
| Layer Mask | Grayscale pixel channel | Brush painting (black/white) | Feathered edges, subject isolation, and blending |
| Vector Mask | Bézier pen path | Anchor point adjustment | Crisp hard-edge product cutouts and geometric logos |
Creative Applications: Typography & Texture Shading
Clipping masks are not limited to basic geometric shapes. Professional designers rely on them across key commercial design scenarios:
Clipping Photos into Bold Typography
Type a bold headline such as "SUMMER" using an extra-black display typeface (like Impact or Montserrat Black). Place a colorful beach photo layer directly above. Turn the photo into a clipping mask with Alt+Ctrl+G.
The letters act as photographic frames. Because the text remains live vector type, you can fix spelling errors, change font styles, or curve text across paths while the background image updates inside.
Non-Destructive Shadow & Highlight Painting
When illustrating character artwork, create an empty layer above your flat color base and clip it. Set the blend mode to Multiply for shadows or Overlay for specular highlights.
Paint freely with large soft brushes: any strokes that overshoot the character boundary are automatically hidden, keeping your coloring clean and contained.
Stacking Multiple Clipped Layers
A single base shape can control dozens of clipped layers simultaneously. For example, in a complex magazine layout, a circular base layer can hold an environmental photo, a gradient color overlay layer, an adjustment curve layer, and a distressed dust texture layer.
Each subsequent layer that you clip stacks into the mask chain. You can identify clipped layers in the Layers panel by their indented thumbnail and small downward-pointing corner arrow.
To give your finished masked graphic dimensional depth, pair your base layer with realistic drop shadow effects that ground the artwork against backgrounds.
Step-by-Step: How to Create a Clipping Mask in PhotoQuill
PhotoQuill provides complete clipping mask support compatible with Adobe PSD files. Here is the exact procedure:
Create Your Base Silhouette Layer
Select the Horizontal Type Tool (T) from the left toolbar and type your word on the canvas, or draw a shape with the Rectangle/Ellipse Tool (U).
Place Your Image Layer Directly Above
Drag an image file from your computer onto the canvas, or press Ctrl+J to duplicate an existing artwork layer. In the Layers panel on the right, make sure this image sits immediately above your text or shape layer.
Create the Clipping Mask
Right-click the top image layer in the Layers list and choose Create Clipping Mask, or use the universal shortcut Alt+Ctrl+G (Option+Command+G on Mac). The thumbnail will indent with a down arrow.
Transform and Refine Composition
Click the clipped image layer. Press Ctrl+Alt+T to activate Free Transform. Drag corners to rescale or move the texture until the visual composition within your base letters looks balanced.
Save as PSD or Export Asset
Click File > Save As PSD to preserve your non-destructive clipping hierarchy for future edits, or choose File > Export PNG for crisp transparent web graphics.