How to Convert Image to PSD with Layers Using AI Assistant
Every graphic designer encounters the frustration of receiving a flat promotional image, flattened web banner, or marketing graphic when the original multi-layer Photoshop file has gone missing. Manually clipping out subjects with the pen tool, using clone stamps to fill background voids, and re-typing text line by line consumes hours of tedious labor. PhotoQuill's AI Assistant automates this process by deconstructing single-layer images into true multi-layer PSD files with editable text, transparent foreground cutouts, and fully reconstructed backgrounds.
Only need a .psd file, not separate layers? The free PNG to PSD and JPG to PSD converters turn your image into a single-layer PSD in seconds, with no sign-in.
How AI Layer Separation Operates Under the Hood
Traditional image converters treat every pixel as a rigid raster matrix. When exporting a flat JPEG to PSD, they simply place all pixels into a locked background layer. PhotoQuill approaches image conversion through a multi-modal computer vision and neural synthesis pipeline designed specifically for professional design reconstruction.
When you submit a flat image to the AI Assistant, a multimodal vision foundation model analyzes the visual scene. It identifies semantic boundaries between isolated subjects (such as products, people, or badges) and ambient background scenery. Concurrently, an optical character recognition and typographic analysis engine detects text lines, measuring bounding boxes, font weight, slant angles, and text color palettes.
Crucially, extracting a foreground subject without fixing the background creates empty holes or jagged ghost silhouettes. To prevent this, PhotoQuill places dilated magenta bounding masks (expanded by 1.5% along bounding perimeters) over all extracted elements. A specialized background inpainting model fills the masked regions with seamless surrounding textures, creating an immaculate base canvas upon which your transparent subjects and editable text layers sit naturally.
Step-by-Step: Deconstructing a Flat Image into a Layered PSD
The entire workflow runs directly within PhotoQuill's web interface. Follow these five concrete steps to convert your flat visual into a fully editable Adobe Photoshop document:
Launch PhotoQuill and Open the AI Assistant
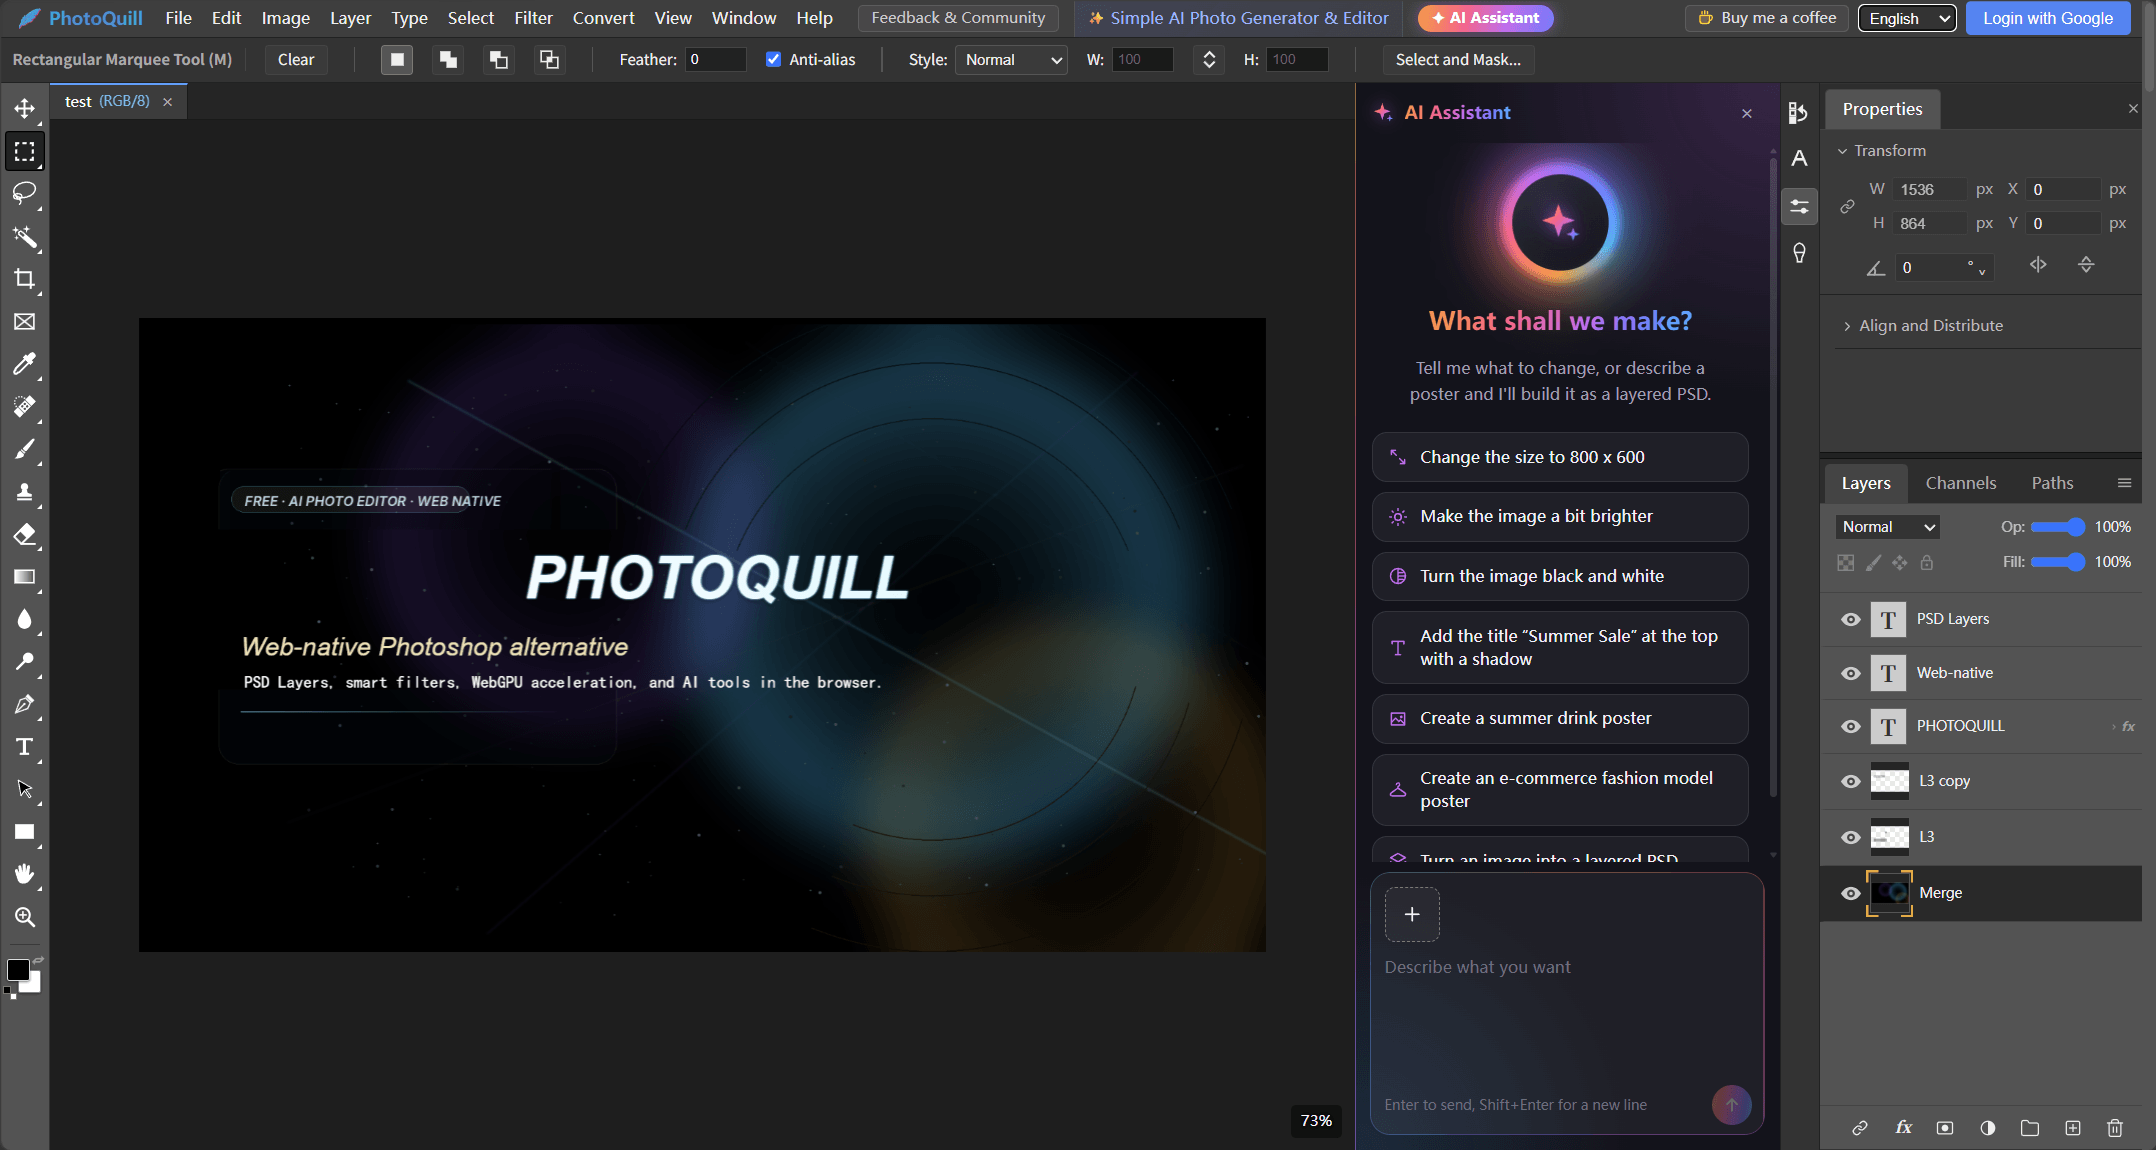
Navigate to the PhotoQuill editor in your web browser. Click the AI Assistant button located in the top menu bar (adjacent to Simple AI Photo Generator). A dedicated conversation panel opens on the right side of the canvas, highlighted by a subtle glowing perimeter animation that signals system readiness.
Upload or Select Your Reference Artwork
Click the dashed plus icon in the bottom-left corner of the AI conversation input box, or drag your image file directly into the panel. If your artwork is already loaded on the active canvas, you can skip uploading; the assistant automatically captures the current viewport as reference context.
Submit the Layer Reconstruction Command
In the chat input field, type Convert this image into a layered PSD or click the pre-configured prompt card in the welcome screen. If you have specific design requirements (for example, keep the headline editable but leave the small footer text on the background), include them directly in your request.
Review the Layer Breakdown Proposal
The AI assistant parses the image structure and presents an itemized layer plan in the chat transcript. You will see distinct entries for the infilled background canvas, floating transparent subject cutouts, design badges, and detected text strings with their corresponding typographic styles.
Inspect Layers and Save Native PSD
Upon confirmation, PhotoQuill executes parallel generation across up to four layers concurrently, assembling each transparent element as it completes. The resulting layered document opens in a new project tab, preserving your original workspace untouched. Inspect the Layers panel to see your independent typography, transparent foreground cutouts, and background plate. Make any immediate edits, then go to File → Save As PSD to download your native Photoshop master file.
Diagnostic Table: Common Separation Challenges and Technical Solutions
Separating complex graphic designs into clean layers occasionally encounters real-world challenges, such as blurred text baselines, semi-transparent drop shadows, or background texture repetition. PhotoQuill implements automated engineering heuristics to resolve these artifacts.
The table below outlines common visual symptoms encountered during layer deconstruction, their technical root causes, and the built-in fixes applied by PhotoQuill's engine:
| Visual Challenge | Underlying Cause | Manual Retouch Fix | PhotoQuill Automated Solution |
|---|---|---|---|
| Dark or Light Fringes on Cutouts | Uncleaned premultiplied alpha along contrast boundaries | Manual Layer → Matting → Defringe (1px ~ 2px) | Automatic alpha channel threshold clamp and premultiplication correction |
| Ghost Doubling Behind Moved Subjects | Under-dilated inpainting mask leaving edge slivers | Manual clone stamping on the background plate | Automatic 1.5% perimeter mask expansion prior to background diffusion |
| Tilted Text Baseline Misalignment | Angled marketing banners causing horizontal bounding drift | Re-typing on transformed vector paths | Geometric fitTiltedTextToBox trigonometric angle alignment |
| Missing Font Glyph in Photoshop | Desktop machine lacks specific web font family | Download font package or substitute system fonts | Embeds standard OpenType metrics with fallback vector raster backup |
| Opaque White Boxes on Cutout Layers | Diffusion model omitting alpha channel on complex textures | Manual wand selection and mask deletion | Automatic secondary neural background removal pass for transparency |
Best Practices for Maximum Separation Fidelity
To achieve the highest fidelity when deconstructing raster images into layered PSDs, feeding the model well-proportioned source material dramatically improves text extraction accuracy and edge sharpness.
Whenever possible, provide reference artwork with a longest edge between 1200 and 2048 pixels. Images smaller than 800 pixels frequently cause compression blur that makes fine text difficult to distinguish from background noise, while excessively large files (exceeding 4000 pixels) will be downsampled to fit neural processing memory windows. Keeping source files sharp and uncompressed ensures optimal OCR results.
For extensive design overhauls where you only need standard format conversion without AI element splitting, review our foundational guide to the image to psd converter. If your workflow involves isolated subject editing or replacing elements in existing compositions, explore our hands-on tutorials on using AI in Photoshop workflows and removing backgrounds with masks.
Because AI layer deconstruction runs cloud-side neural inference for every layer, it requires a PhotoQuill account with sufficient credits before the generation queue opens. The AI presents an itemised credit breakdown for each proposed layer — background canvas, transparent subject cutouts, design badges, and text strings — before asking for your confirmation. You only pay for the layers you approve. Editable Text layers generated from plain typography are always free; only rendered art-text and inpainted image layers consume credits. A typical five-layer promotional graphic uses between 90 and 150 credits, completed in roughly three to five minutes.
It is also worth noting that the finished PSD is a high-fidelity recreation, not a pixel-perfect crop of your source file. Uploaded images often carry compression artefacts, watermarks, or low resolution; rebuilding each element from scratch allows the AI to produce sharp, clean assets at a consistent 2048-pixel long edge regardless of input quality.