How to Change Canvas Size in Photoshop (Step-by-Step)
Expanding or trimming your document workspace is one of the most common tasks in image editing. Whether you need to add bleed margins for print, create a clean white polaroid frame, or make room for extra text and graphics, changing your canvas size gives you complete control over document geometry without stretching your photo. Here is the step-by-step walkthrough for Photoshop and PhotoQuill.
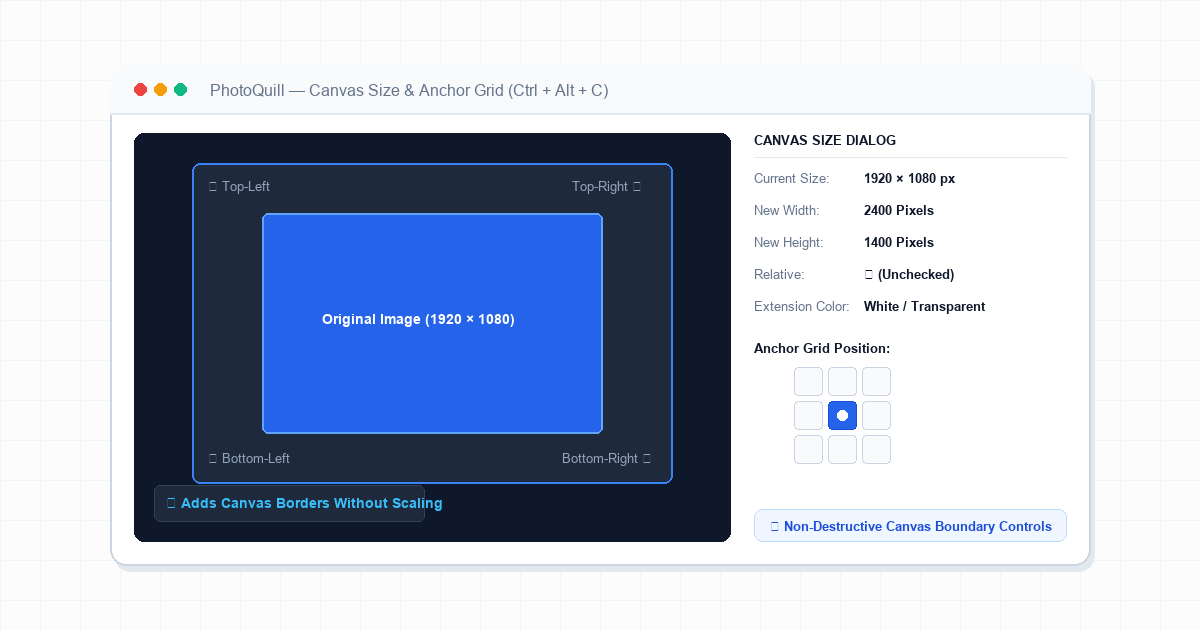
Canvas Size vs. Image Size: Understanding the Difference
New editors frequently confuse Image Size with Canvas Size, leading to distorted proportions or unwanted pixel degradation. The two commands perform fundamentally distinct mathematical tasks:
- Image Size (Ctrl+Alt+I): Resamples the artwork. If you change a 1000px image to 2000px, Photoshop recalculates and stretches the pixels, enlarging the visual content.
- Canvas Size (Ctrl+Alt+C): Leaves all existing pixels completely untouched. It merely adds empty margins around the outer edges or trims excess perimeter workspace away.
For a detailed breakdown of resampling algorithms and print resolutions, check our guide on how to resize an image using Photoshop.
| Operation | Shortcut | Pixel Resampling | Primary Use Case |
|---|---|---|---|
| Canvas Size | Ctrl + Alt + C |
No (0% distortion) | Adding borders, polaroid frames, side-by-side comps |
| Image Size | Ctrl + Alt + I |
Yes (Bicubic/Bilinear) | Downscaling for web or upscaling print resolution |
| Crop Tool | C |
Optional | Interactive freehand framing and straightening |
Mastering the 3x3 Anchor Grid & Relative Mode
The Canvas Size dialog contains two powerful settings that make precise layout adjustments effortless:
The 3x3 Directional Anchor Grid
The square anchor widget controls where your existing artwork stays anchored as new canvas space appears around it:
- Center Anchor (Default): Adds equal space on all four sides (top, bottom, left, right). Ideal for photo borders.
- Top Anchor: Pinned to the top edge; all new canvas expands downward. Perfect for adding article body text below a header image.
- Left Anchor: Pinned to the left side; canvas expands rightward. Ideal for creating side-by-side before/after comparison graphics.
The Relative Checkbox
Instead of calculating total pixel dimensions in your head (e.g., adding 40px to 1920px to get 1960px), simply check the Relative box. Enter 40 px in Width and 40 px in Height.
Photoshop will automatically append exactly 20px of padding to each side. To trim an interactive area manually, see our walkthrough on cropping images in Photoshop.
Handling Transparency and Multi-Layer Documents
When you expand canvas boundaries on a document containing multiple transparent layers, the new margin area defaults to transparent checkerboard pixels. This is ideal for PNG icons, transparent web logos, and layered PSD compositing.
However, if your document has a locked single Background layer, the canvas extension color will use the color selected in the Canvas extension color dropdown (White, Black, Gray, or Background Color).
If you need to change orientation from landscape to portrait after expanding, learn how to reorient graphics with our guide on flipping images in Photoshop.
Step-by-Step: How to Change Canvas Size in PhotoQuill
PhotoQuill includes a pixel-accurate Canvas Size tool matching Photoshop standards. Follow these steps:
Open the Canvas Size Dialog
With your image open on the canvas, click Image > Canvas Size... in the top menu bar, or press the universal shortcut Ctrl+Alt+C (Command+Option+C on Mac).
Set Your Measurement Units
Select your desired unit from the dropdown next to the dimension boxes. Options include Pixels, Percent, Inches, or Millimeters.
Enter New Dimensions
Type in your new Width and Height. For example, change a 1200px wide canvas to 1600 px to create space for a side banner.
Pick Your Anchor Alignment
Click the square inside the 3x3 anchor grid that represents where your existing photo should remain. Leave it centered for symmetric border expansion.
Confirm & Export
Choose your extension color (or keep transparent) and click OK. Your workspace updates instantly. Go to File > Export JPG or PNG to download.