How to Resize an Image Using Photoshop (And the Best Free Web Method)
Knowing how to resize an image using photoshop is a foundational skill for any digital creator, marketer, or photographer. Whether you are prepping a high-resolution photo for Instagram, shrinking a massive hero banner for your website to improve loading times, or formatting a document for physical print, getting the dimensions and pixel density right is critical. In this guide, we will walk you through the exact steps to resize images in Photoshop without losing quality, and show you how to do it instantly for free if you don't have the software installed.
The Professional Photoshop Method
Adobe Photoshop provides precise control over image resampling. Here is the step-by-step process for altering your image dimensions:
- Open the Image: Launch Photoshop and load your file (Ctrl+O / Cmd+O).
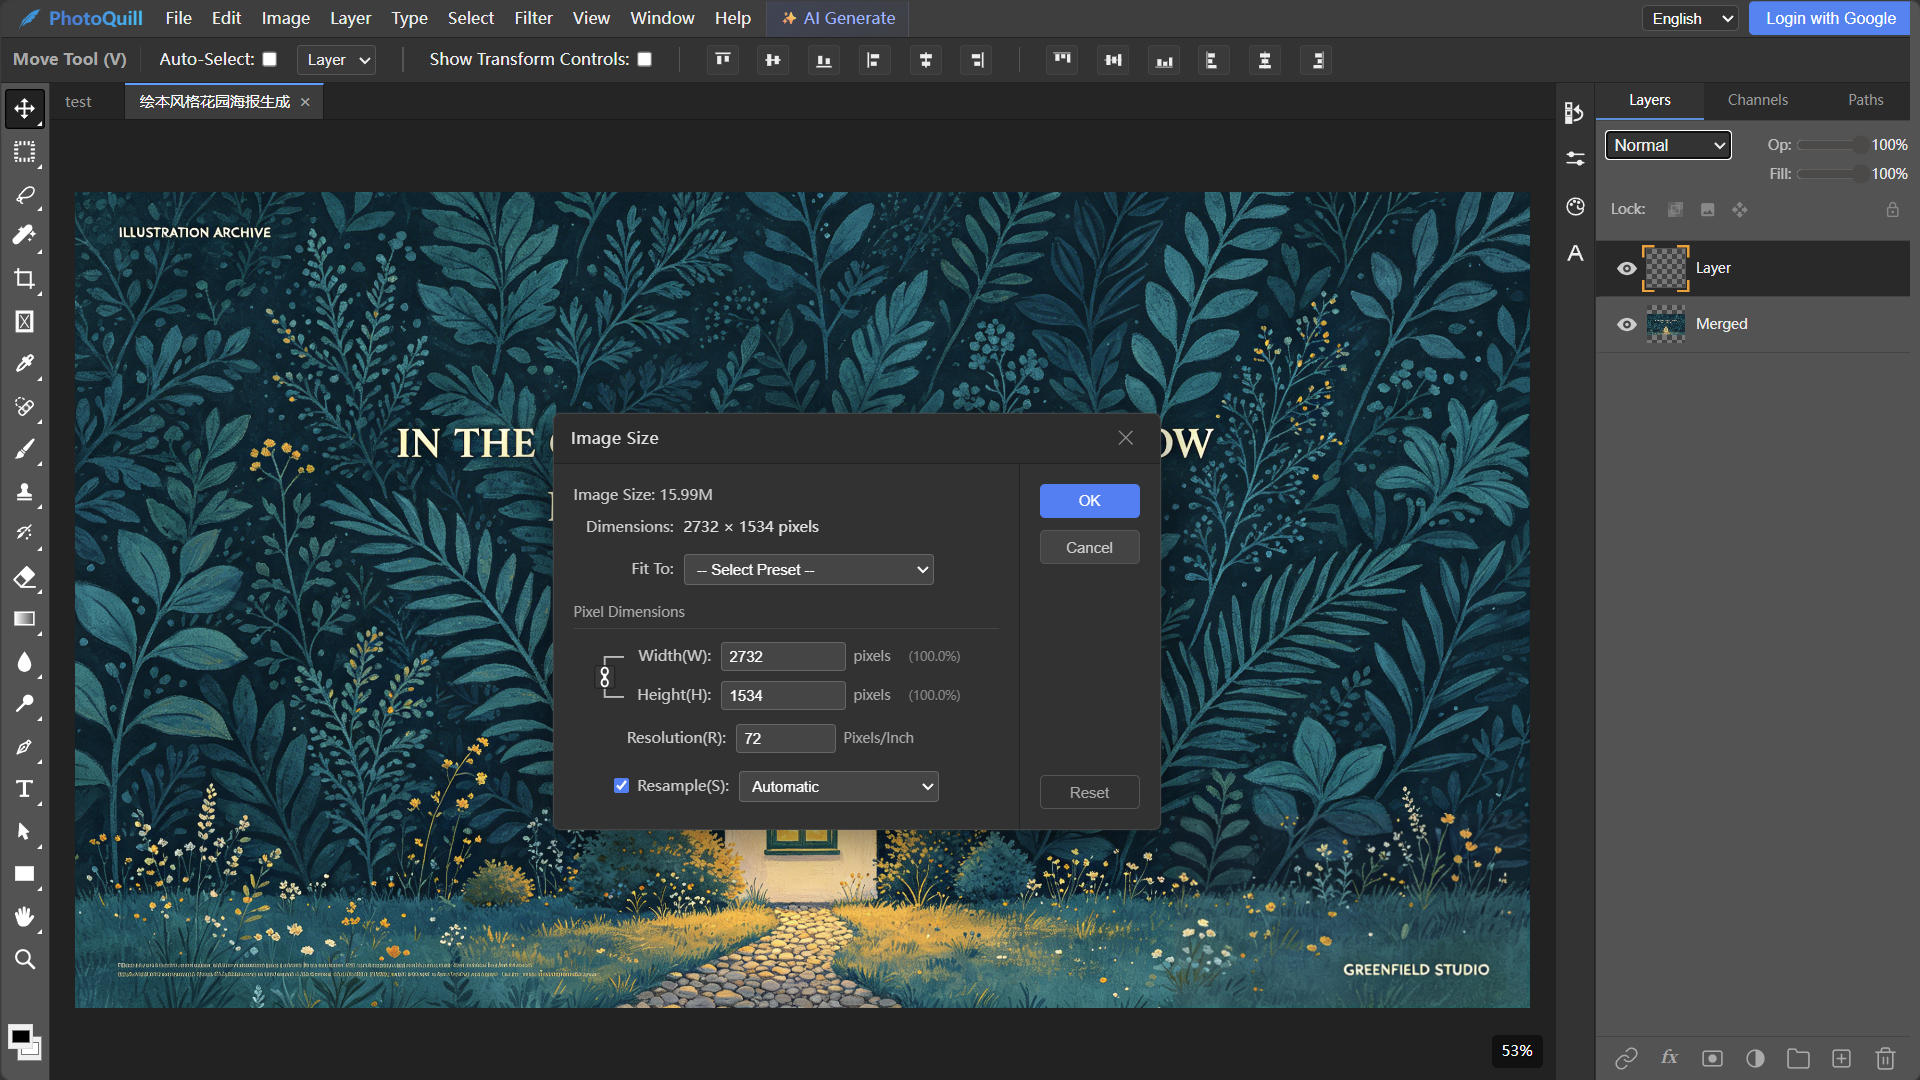
- Access the Image Size Dialog: Navigate to the top menu and select Image > Image Size... (Shortcut: Alt+Ctrl+I / Opt+Cmd+I).
- Lock the Aspect Ratio: Ensure the "chainlink" icon between the Width and Height inputs is highlighted. This constrains the proportions so your image doesn't look stretched or squished.
- Enter Dimensions: Type in your new target width or height. You can change the unit of measurement from Inches to Pixels depending on your needs (web use requires Pixels).
- Choose Resampling: If you are shrinking the image, select "Bicubic Sharper (Reduction)". If you are enlarging it, select "Bicubic Smoother (Enlargement)".
- Apply and Export: Click OK. Then go to File > Export > Export As... to save your optimized file as a JPG, PNG, or WebP.
This method is flawless, but paying a hefty monthly subscription just to execute a basic resampling operation is overkill for many users.
The Zero-Install Way: Resizing with PhotoQuill
If you need professional-grade resizing instantly and don't want to launch a heavy application, PhotoQuill is the ultimate solution. It is a completely free, browser-based editor that mirrors the professional layout of desktop software but runs entirely via WebGPU on your local machine.
Instant Drag and Drop
Navigate to the PhotoQuill Editor. There are no accounts to create and no paywalls. Drag your JPG, PNG, or even a heavy multi-layered PSD file directly into the browser window.
Familiar Image Size Menu
Just like the traditional software you are used to, click Image in the top menu bar, then click Image Size. Our interface intentionally uses the exact same logic and shortcuts, making your transition seamless.
Adjust and Export Securely
Type in your new dimensions. PhotoQuill utilizes advanced local algorithms to ensure your image remains incredibly crisp during the downscaling process. Because this happens locally on your machine, your files remain completely private. Once done, go to File > Export As to save your optimized file.