How to Blur Background in Photoshop (Fast & Natural)
A creamy, shallow depth of field instantly elevates amateur photos into cinematic portraits. When taking pictures on smartphones or compact lenses, deep camera sensors capture sharp backgrounds that distract from your main subject. Fortunately, you can simulate optical lens blur with precise edge separation in minutes. Here is the exact workflow for creating professional background blur without unnatural edge halos.
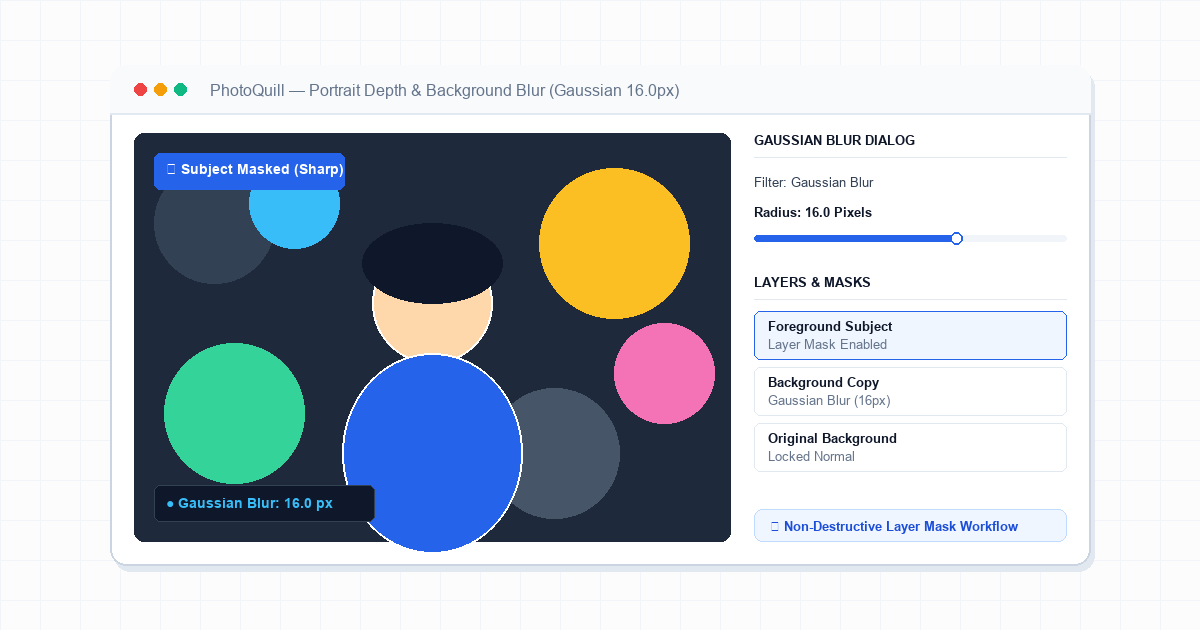
Why Direct Blurring Fails and How Proper Masking Solves It
Many beginners make the mistake of selecting their background and immediately running a blur filter over the canvas. While this softens wall textures or distant trees, it leaves an ugly glow: colors from the subject bleed outwards into the background, creating a blurry outline halo around heads and shoulders.
Authentic photographic bokeh occurs because background light cones expand across the focal plane behind the subject. To replicate this digitally, your workflow must separate the scene into two distinct visual planes: an untouched, razor-sharp foreground subject layer, and a widened background layer that sits underneath.
If you need to cut out fine hair or complex silhouette edges prior to blurring, study our detailed guide to removing backgrounds in Photoshop for precise selection tips.
| Blur Method | Processing Speed | Edge Cleanliness | Best Use Case |
|---|---|---|---|
| Gaussian Blur + Layer Mask | Instant (GPU) | High (with subject isolation) | Portraits, product close-ups, and social graphics |
| Lens Blur Filter | Moderate | Very High (simulates aperture iris) | Fine art photography and night city bokeh highlights |
| Field Blur / Tilt-Shift | Moderate | High (gradient focal transitions) | Architectural miniatures and landscape focal falloffs |
| Radial / Motion Blur | Fast | Creative directional | Action sports, running subjects, and dynamic speed trails |
Two Core Techniques: Fast Gaussian vs. Optical Lens Depth
Depending on your project requirements and hardware speed, choose between two primary workflows:
The Clean Non-Destructive Two-Layer Stack
Duplicate your background layer by pressing Ctrl+J. Make an accurate subject selection, copy only the subject to a top layer, and then expand your background selection by 3 pixels before blurring. This ensures that no dark edges from the subject leak into the blurred background pixels underneath.
After blurring the bottom plate, your crisp top layer sits cleanly on top. For smooth transition effects between both plates, review our tutorial on how to blend using Photoshop layers.
Gradient Focal Falloff for Ground Planes
In real life, blur is never uniform. Objects closer to the camera remain slightly sharper than trees 50 feet behind. Use a Quick Mask (Q) with the Gradient Tool (G) running from black to white along the ground plane.
When you exit Quick Mask, your selection mirrors a real-world distance ramp. Applying Gaussian Blur to this graduated selection produces an organic depth gradient from front to back.
Polishing the Final Composite
Once you achieve the desired blur intensity, inspect your artwork at 100% zoom. Digital blur eliminates natural camera sensor noise, which can make blurred backgrounds look suspiciously slick compared to a grainy subject.
To blend both layers harmoniously, select your blurred background layer and click Filter > Noise > Add Noise.... Add between 0.8% and 1.5% Uniform Monochromatic noise. This micro-texture matches the foreground camera grain, tricking the human eye into perceiving a genuine optical photograph.
To finish your portrait with crisp focal details, balance your soft background by sharpening camera photos across eyelashes, jewelry, and clothing textures.
Step-by-Step: How to Blur Background in PhotoQuill
You can achieve studio-grade portrait depth directly in your browser without installing heavy software. Follow these exact steps:
Open Your Image & Duplicate Layer
Drop your photo onto the PhotoQuill canvas, or click File > Open in the top menu. Press Ctrl+J (Command+J on Mac) to duplicate the background layer.
Isolate Your Subject
Select the Quick Selection Tool (W) from the left toolbar, or click Select > Subject from the top navigation. Drag across your subject until the marching ants outline matches the silhouette.
Invert Selection to Background
Press Ctrl+Shift+I (Command+Shift+I on Mac) or click Select > Inverse. The selection border will now enclose everything except your subject.
Apply Gaussian Blur
Click Filter > Blur > Gaussian Blur... in the top menu. In the dialog slider, set Radius to 14.0 px for medium bokeh. Toggle the preview checkbox to verify, then click OK.
Deselect and Export
Press Ctrl+D to clear the selection. Click File > Export JPG or Export PNG to download your finished portrait in full native resolution.