How to Scale an Image in Photoshop
Scaling images accurately requires choosing between layer transformations and global document resampling. Here is how to resize layers and full images without distortion or blurring.
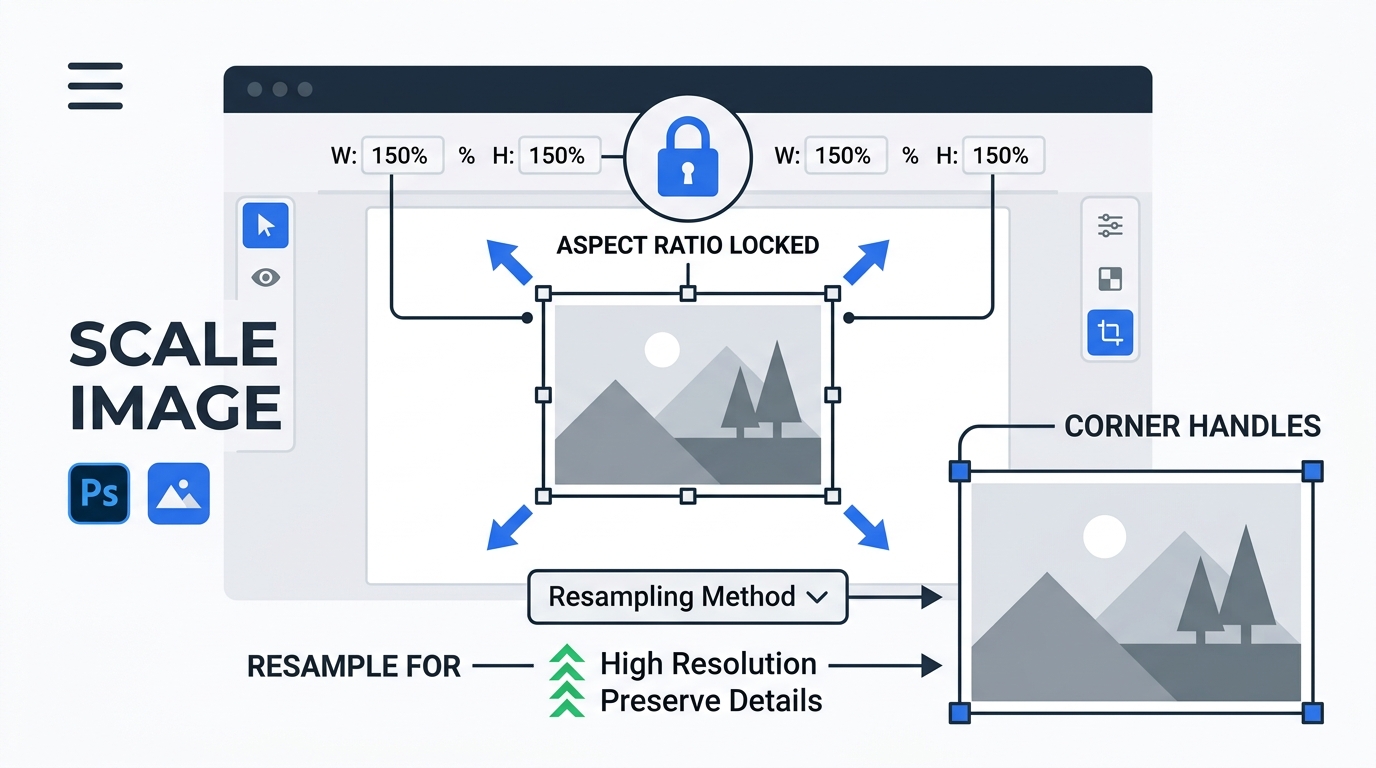
Layer Scaling vs. Document Image Sizing
Before adjusting dimensions, identify whether you need to scale an individual graphic element or change the entire photo document. Scaling a single layer fits a graphic into a layout, while document scaling prepares an entire file for web uploading or physical print production.
In Photoshop and PhotoQuill, these two tasks rely on distinct commands:
- Free Transform (Ctrl+T): Operates on the currently selected layer. It adjusts width and height relative to the existing canvas without changing the master resolution of your document.
- Image Size (Alt+Ctrl+I): Recalculates every layer, mask, and path across your entire project file according to target pixel or inch specifications. If your goal is expanding boundaries without stretching existing graphics, review our canvas size adjustment guide instead.
Understanding this distinction prevents accidental downsampling of your entire artwork when you only intended to resize an imported product graphic.
Locking Aspect Ratios and Center Scaling
Stretching photographs destroys natural facial proportions and distorts geometric typography. Maintaining the native aspect ratio ensures that height and width scale at identical percentages during transformation.
Precision Transform Modifiers
When Free Transform is active, holding down specific keys changes how the bounding box responds to cursor movements:
- Corner Dragging: Scales width and height proportionally. Modern creative suites keep this ratio locked automatically.
- Alt Key (Option on Mac): Scales the object outward or inward from its center reference anchor rather than the opposite corner.
- Shift Key: Temporarily unlocks proportional constraints if you intentionally need non-uniform stretching.
Review the standard interpolation algorithms used when scaling pixel data:
| Resampling Method | Direction | Primary Strength | Typical Application |
|---|---|---|---|
| Bicubic Automatic | Both | Balances contrast and smooth tonal gradations | General photography and mixed graphic assets |
| Bicubic Smoother | Enlargement | Minimizes jagged edges when increasing dimensions | Upscaling lower-resolution camera shots for posters |
| Bicubic Sharper | Reduction | Preserves intricate fine details during downscaling | Exporting web banners and compressed social images |
| Nearest Neighbor | Both | Preserves hard-edged pixel blocks without blending | Retro pixel art and crisp UI screenshot scaling |
To inspect overall file compression and resolution benchmarks when exporting, check our image resizing tutorial for optimal web dimensions.
Preventing Quality Loss with Smart Objects
Standard raster layers suffer from destructive resampling. If you scale a raster layer down to 10% of its size, Photoshop discards 90% of the pixel data. If you scale it back up to 100% later, the software must invent missing pixels, resulting in severe blurriness.
Converting a layer into a Smart Object before scaling solves this problem completely. A Smart Object stores the original high-resolution pixel array inside a protected container. You can scale the layer down, enlarge it, and transform it repeatedly without degrading the underlying image quality.
Step-by-Step: How to Scale an Image in PhotoQuill
Open Your Image in PhotoQuill
Go to PhotoQuill in your web browser. Click Open From Computer on the start screen, or press Ctrl+O to select your graphic from local storage.
Select Layer in the Layers Panel
In the right-side Layers panel, click the thumbnail of the layer you wish to scale. If the layer is locked as a Background layer, click the lock icon to convert it to an editable floating layer.
Activate Free Transform
Press Ctrl+T on Windows (or Cmd+T on macOS). You can also click Edit > Free Transform from the top menu bar. A bounding box with 8 adjustment handles appears around the image.
Drag Corner Handles with Precision
Position your cursor over any corner handle until the cursor turns into a double-ended diagonal arrow. Click and drag inward to shrink or outward to enlarge. Hold Alt to scale symmetrically from the center.
Confirm Transformation and Export
Press Enter to commit your transformation. If you need to scale the entire canvas rather than one layer, press Alt+Ctrl+I to open Image Size. Finally, save your file via File > Export JPG or File > Save as PSD.