How to Vectorize an Image: Convert Bitmaps to Scalable Vector Graphics
Every graphic designer, small business owner, and screen printer has encountered this dilemma: an essential company logo, hand-drawn sketch, or icon exists only as a tiny, low-resolution .jpg or .png file. When scaled up for large merchandise printing, storefront signage, or high-density Retina web displays, the pixels shatter into blurry, jagged stair-steps. Learning how to vectorize an image converts rigid pixel grids into fluid mathematical vectors, giving your graphics infinite scalability from a business card to a highway billboard.
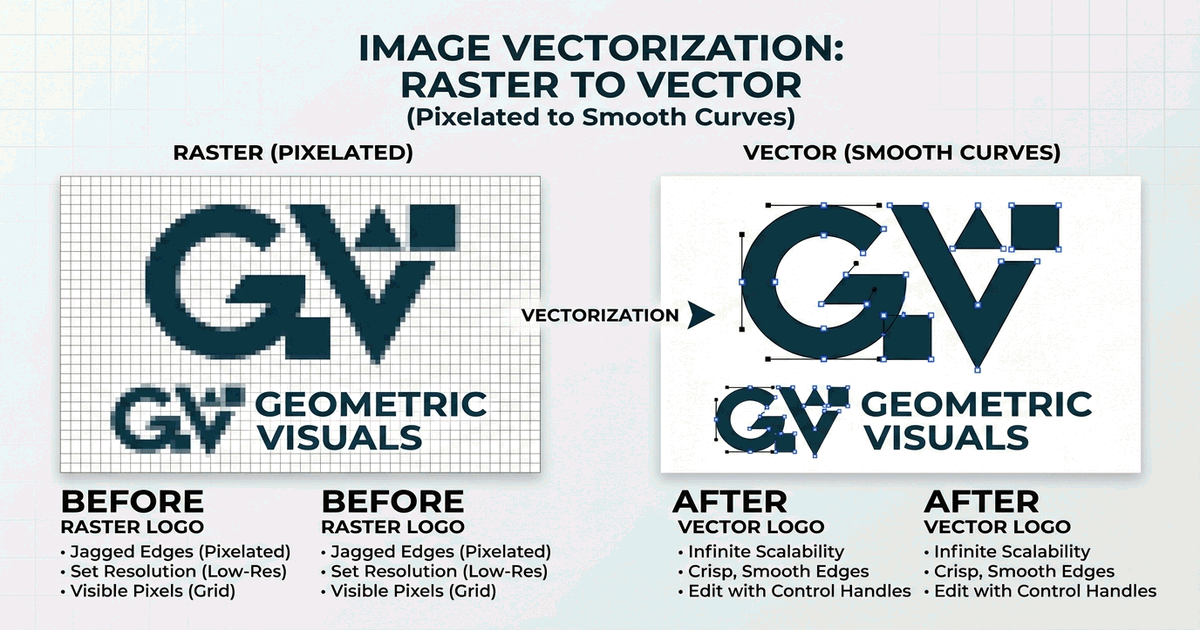
The Fundamental Science: Pixels (Raster) vs Bézier Curves (Vector)
Understanding the difference between raster and vector graphics clarifies why vectorization is so critical for modern branding. Raster formats—such as JPEG, PNG, GIF, and WebP—record visual information as an array of colored squares called pixels. Once established, this pixel grid cannot be enlarged without interpolating and blurring edges.
In contrast, vector graphics—principally SVG (Scalable Vector Graphics), EPS, and PDF—record visuals as mathematical formulas connecting anchor points with Bézier curve tangents. A circle in SVG is not a collection of shaded dots; it is a mathematical instruction defined by an origin point, radius, stroke thickness, and fill color. Consequently, zooming in 10,000% retains microscopic razor sharpness.
| Comparison Metric | Raster Bitmap (JPG / PNG) | Vector Graphic (SVG / EPS) |
|---|---|---|
| Underlying Structure | Fixed 2D grid of colored pixels | Mathematical coordinate paths & Bézier curves |
| Scalability | Loses sharpness when enlarged (pixelation) | Infinitely scalable with zero loss of clarity |
| Ideal Use Cases | Complex real-world photographs & portraits | Logos, typography, icons, line art & vinyl decals |
| File Size Behavior | Scales with resolution (larger dimensions = heavier file) | Independent of dimensions (scales with path complexity) |
Method 1: Preparing and Tracing Bitmaps in PhotoQuill
Successful vectorization begins with clean raster pre-processing. Removing pixel noise, raising contrast, and sharpening boundary edges ensures that vector tracing algorithms trace smooth mathematical curves rather than erratic noise:
- Open the PhotoQuill Workspace and load your raster graphic.
- If the image has a colored or textured background, use the magic wand or layer mask to isolate the main subject onto a clean transparent or solid white backdrop.
- Apply Image → Adjustments → Threshold or Levels to push light grey noise to pure white and darker tones to pure black. Clean contrast creates crisp vector outlines.
- Select your subject using the Magic Wand or Color Range tool.
- In the Paths panel, click Make Work Path from Selection. Set tolerance to
1.5pxto strike the ideal balance between path fidelity and node simplicity. - Export the resulting vector paths as an SVG file via File → Export As → SVG.
3 Essential Rules for High-Fidelity Vector Tracing
Observe these professional rules when vectorizing brand assets:
1. Optimize Source Image Resolution
Tracing an image that is only 150 pixels wide will produce wavy, misshapen curves because the algorithm cannot deduce the true curvature through coarse pixel blocks. Upscale low-resolution logos using clean bicubic sampling before tracing to give the edge detector ample spatial data.
2. Node Simplification (Path Smoothing)
A common error in automated vectorization is generating thousands of unnecessary anchor nodes. Every redundant node increases SVG file payload and creates micro-bumps along smooth curves. Always run a path simplification pass to prune anchor points while maintaining geometric fidelity.
3. Separate Complex Graphics by Color Layers
If your graphic contains multiple distinct colors (such as a multi-toned company crest), trace each color group as an independent vector layer. This allows you to recolor individual elements later. For color adjustment tips, consult our tutorial on changing colors of objects cleanly.
When Should You Vectorize vs When to Keep Raster?
Vectorization is ideal for logos, line illustrations, icon sets, technical diagrams, and typography intended for laser cutting, embroidery machines, screen printing, or SVG web icons. However, natural photographic portraits, landscape photography, and complex watercolor paintings should remain in raster formats (such as JPG or WebP), as converting millions of subtle color gradients into vector polygons creates gargantuan file sizes with an unnatural, posterized appearance.